Scheduling Events with the Event Scheduler
The Event Scheduler allows RCOM Gateway to trigger workflows based on time, rather than device events or external API calls. It creates internal, time-based events that flow through the standard ingestion pipeline.
Use the Scheduler when an action must occur on a fixed schedule - daily, hourly, or as a one-time execution without requiring external systems or hardware devices.
When to Use the Scheduler
The Event Scheduler can be applied in different scenarios, including:
- Run periodic tasks such as daily reports, system cleanups, or audits at fixed times.
- Trigger one-off actions (e.g., 31st Dec at 11:59 PM).
- Running maintenance or automation routines that have no corresponding device event.
- And more.
The Event Processor picks up the scheduled event and executes the linked workflow.
Create a Scheduled Event
To create a scheduler-based trigger:
Step 1: Navigate to Scheduler
From the Gateway dashboard:
- Go to Settings > Client Settings > Scheduler > Event Trigger
- Click + Add New
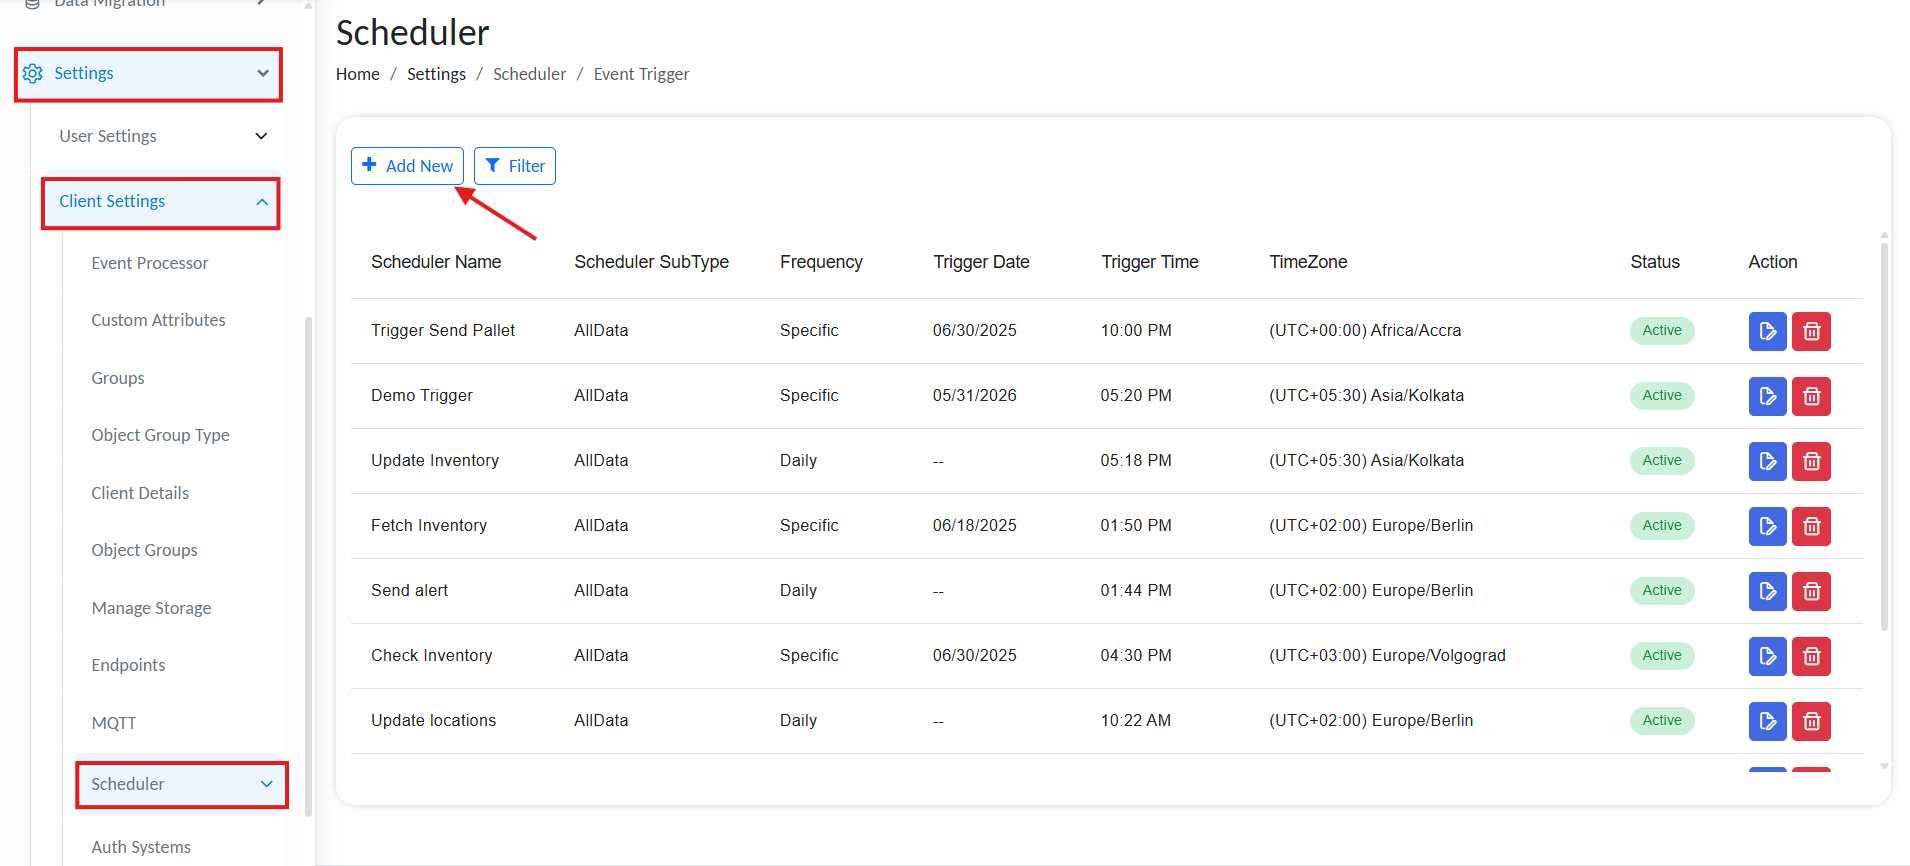
List of scheduled triggers
Step 2: Configure Scheduler Fields
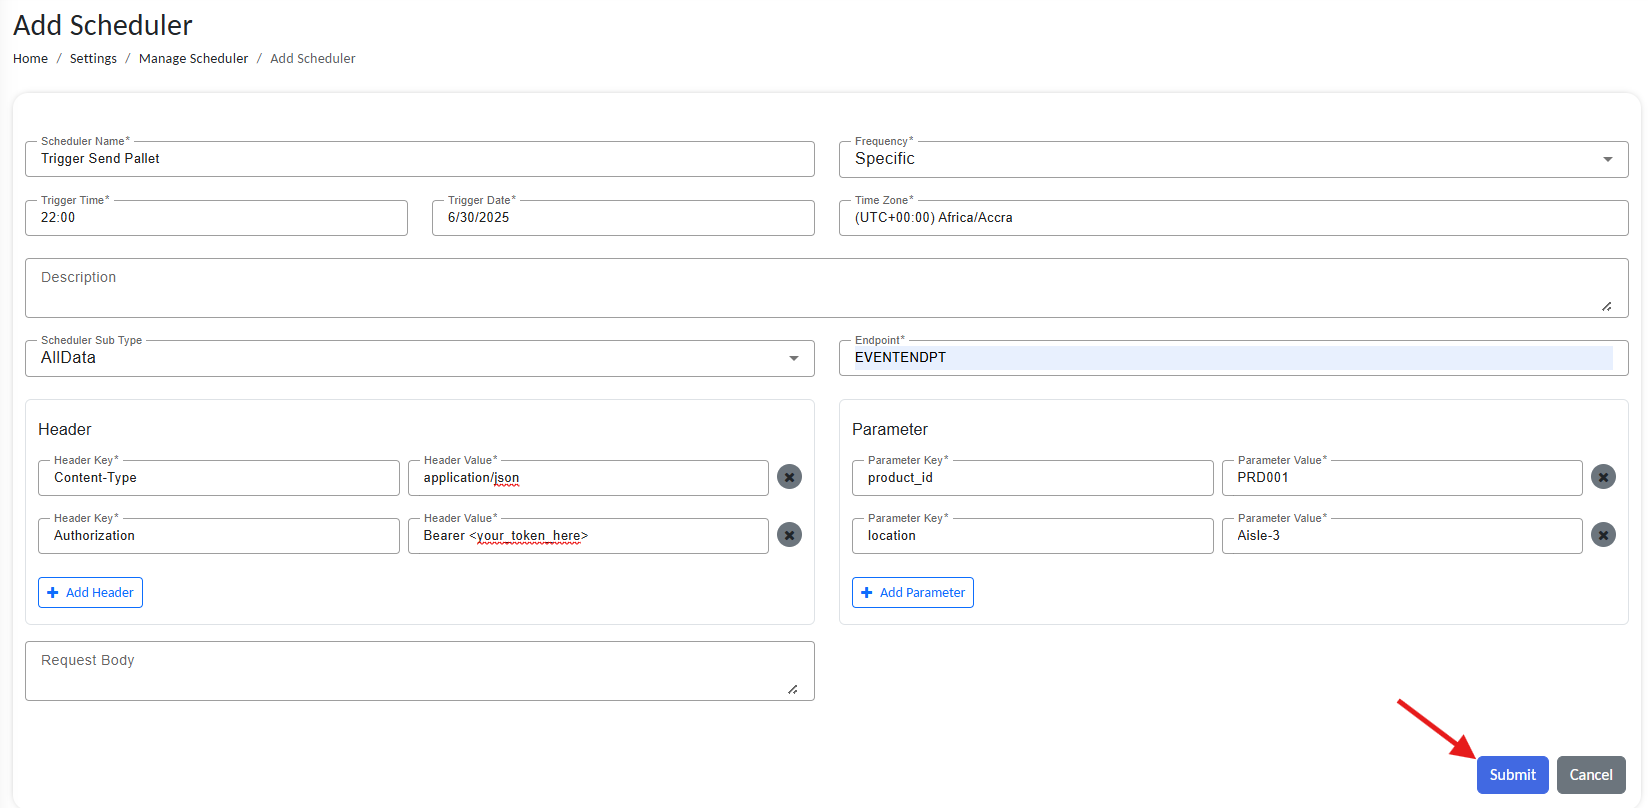
Schedule REST API Trigger
| Field | Description |
|---|---|
| Scheduler Name | Unique identifier for this scheduler task. |
| Frequency | How often to trigger the event. - Daily: Event will be triggered daily at a selected time. - Specific: Event will be triggered on a specific date and time. - Interval: You can select a start date, end date and a Interval in minutes, the vent will be triggered every n minutes in the selected time frame. |
| Trigger Time | Time of day to trigger the event (24-hr format). |
| Trigger Date | Required if Specific is selected. |
| Time Zone | Execution zone (e.g., Asia/Kolkata UTC+05:30). |
| Scheduler SubType | Choose AllData or similar formats (matches endpoint’s expected type). |
| Endpoint (Source Name) | Enter a custom source name. This is the same Source Name used in Event Processors. |
| Headers / Params / Body | Optional values that simulate an incoming API request (identical to REST API input). |
Step 3: Save and Activate
- Click Submit to activate the scheduler.
The new entry will appear in the Scheduler list, with status marked as Active.
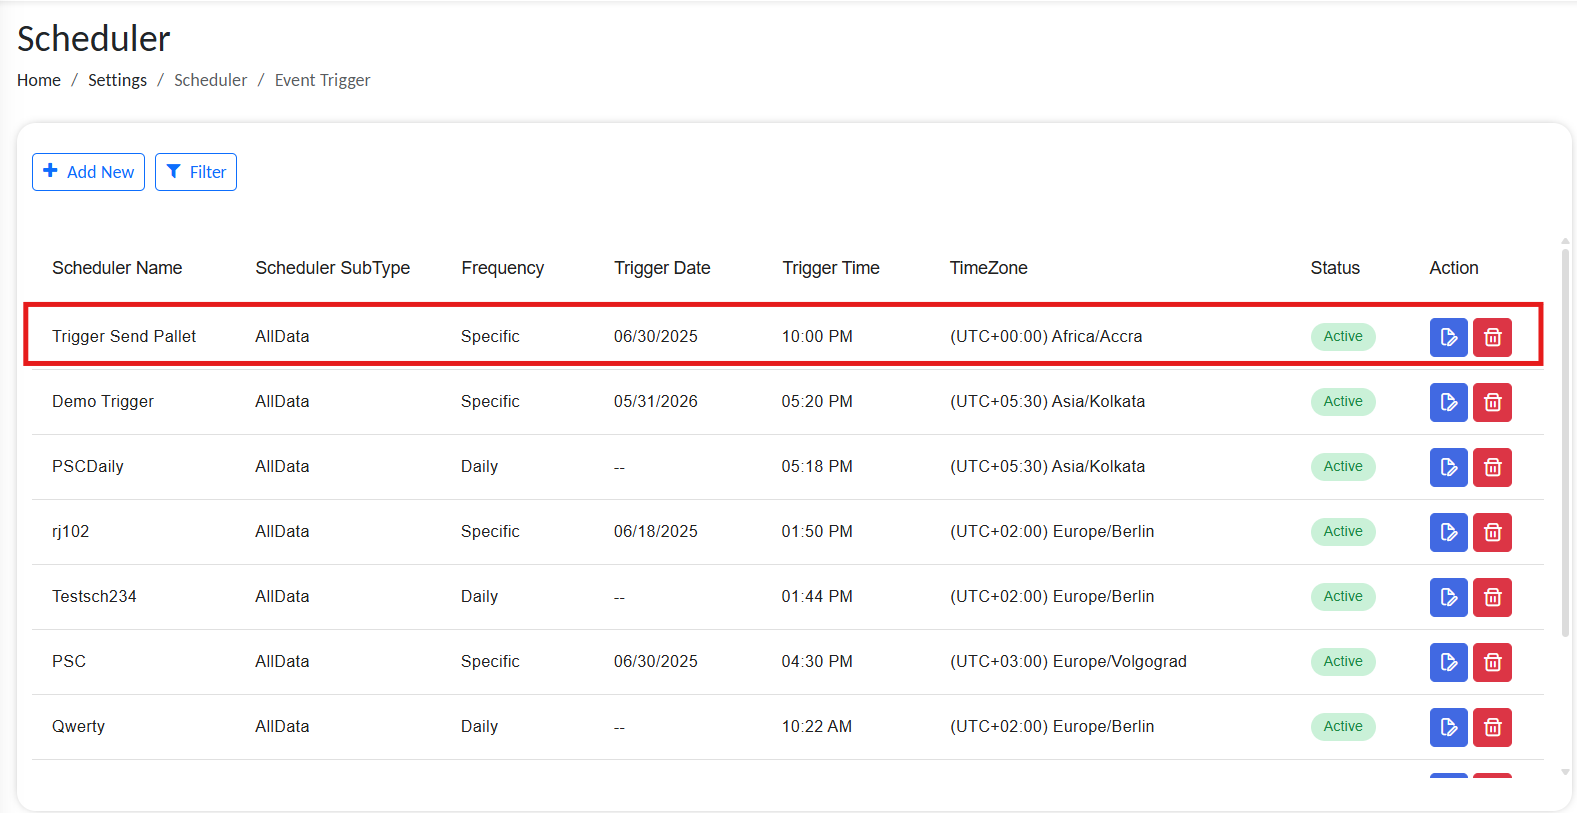
Active scheduled trigger
How Scheduled Events Flow Through the System
At the scheduled time:
- Gateway generates a Scheduled Event.
- The event is passed into the selected source name.
- The matching Event Processor receives the event.
- The configured workflow is triggered with the provided body/headers/params.
✅ Best Practices & Notes
- Match the Source Name in the Scheduler with the Event Processor’s Source Name.
- Align the Time Zone carefully to prevent timing mismatches.
- Test workflows with sample events before activating them on a schedule.
- Use meaningful Scheduler names to keep track of recurring tasks easily.