REST API Endpoint Configuration in RCOM Gateway
The REST API is the one of the data ingestion channel for RCOM Gateway, enabling seamless, on-demand communication between external systems and the platform. This guide provides the technical specifications and step-by-step procedures required to configure, secure, and test API endpoints for enterprise integration.
Where to Begin
From the RCOM Gateway dashboard, Go to:
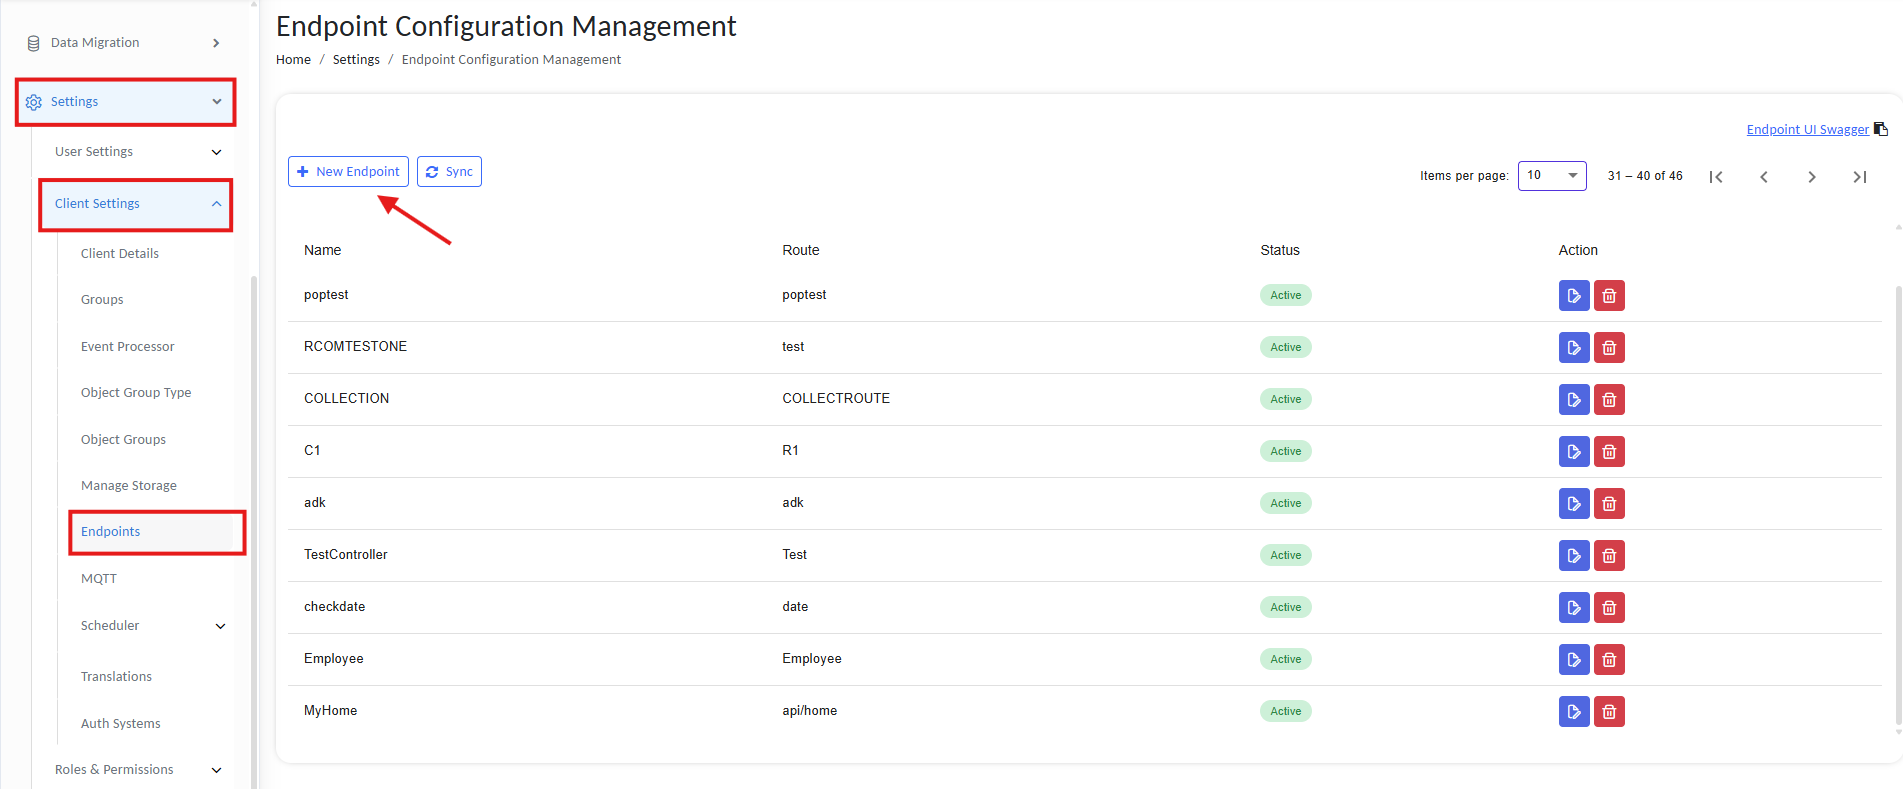
- Settings > Client Settings > Endpoints
From this interface, you can manage the lifecycle of your endpoints:
- View: Monitor existing REST configurations.
- Edit/Delete: Modify active routes or remove deprecated interfaces.
- Create: Initialize new ingestion points via the + New Endpoint button.
REST API endpoints
To create a new one, click “+ New Endpoint.”
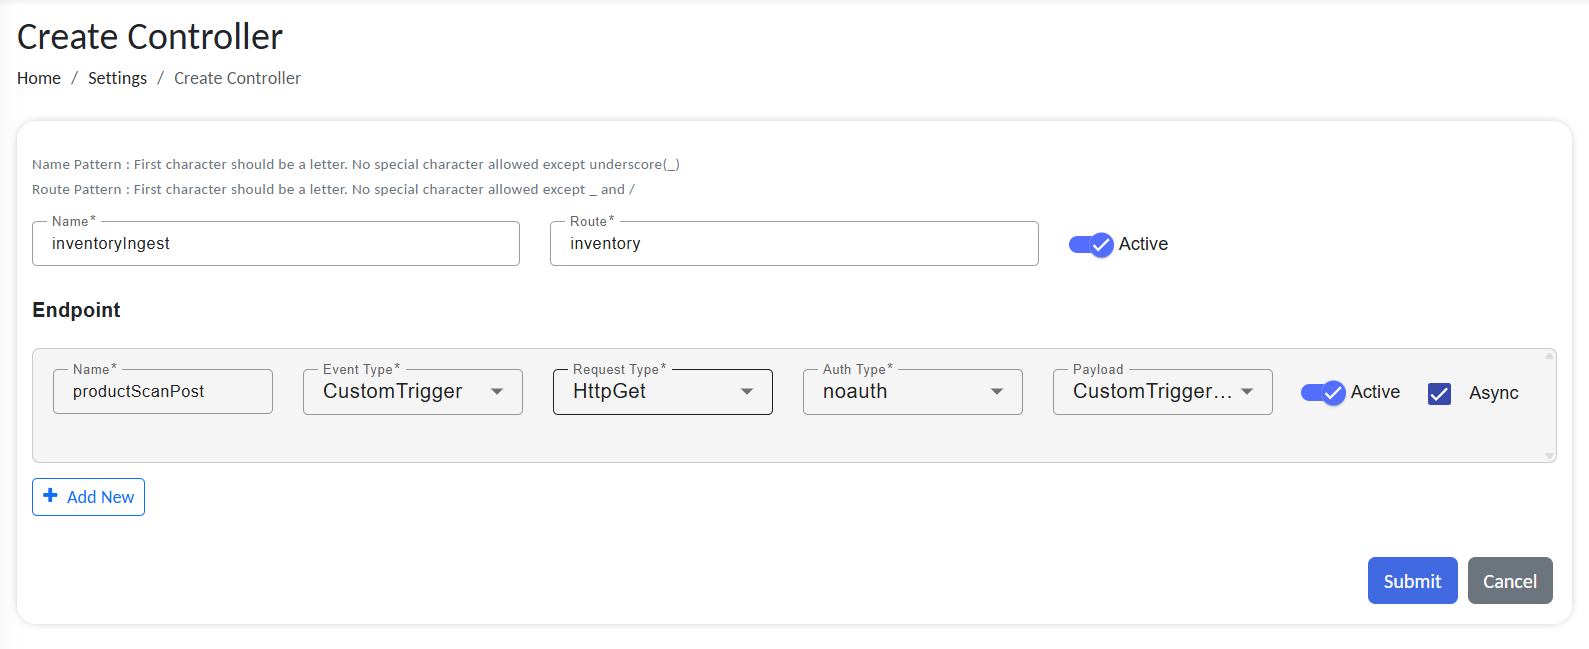
Step 1: Define the API Endpoint (Base Configuration)
The API Endpoint acts as a logical container for related data routes. It defines the root URL and global status for all sub-paths defined within it.
Configure new API endpoint
Configuration Fields
| Field | Description |
|---|---|
| Endpoint Name | Unique internal identifier (e.g., Logistics_Ingest). |
| Base Route Path | Starting point of your URL (e.g., /RCOMENDPOINTAPI/inventory). Must start with a letter and use only alphanumeric characters or underscores ( _ ). |
| Active (Toggle) | Globally enables or disables all routes under this endpoint. |
Mandatory URL Structure: All RCOM Gateway URLs must include the RCOMENDPOINTAPI segment.
Example:
https://rcom-gateway.example.com/RCOMENDPOINTAPI/inventory
Step 2: Configure Individual Routes
Each Route defines how a specific kind of data is handled under the API Endpoint. You can add multiple routes for different purposes.
Click “+ Add New” under Endpoints and configure:
Route Configuration Fields
| Field | Description |
|---|---|
| Route Name | The final segment of the URL (e.g., productScanPost, stockUpdateGet) |
| Event Type | Defines how RCOM Gateway processes incoming data: - AllData: Generic payloads- CustomTrigger: Special format used inside gateway- EpcisMessage, EpcisObject: EPCIS-compliant data- GhostData: Used for communication between RcomMobile and Gateway- UHFTagRead: RFID tag scan events |
| Request Type | HTTP method: - HttpPost: External systems send data into RCOM Gateway- HttpGet: External systems want to request data from RCOM Gateway |
| Auth Type | Security method: - noauth: Public (use for testing)- basic: Username/password based authentication. Endpoint only accesible via mapped External users- OAuth2: Token-based access. You can select roles that can access this endpoint. Endpoint only accesible via Access Tokens or Bearer token for user with the same role access. |
| Payload Type | Defines how RCOM Gateway interprets the data structure. Auto-populated based on the Event Type. |
| Active (Toggle) | Enable or disable this route |
| Async (Checkbox) | Process request in the background: - Enabled = API calls allow the client to continue without waiting for the server’s response. - Disabled = API calls wait for the server to respond before continuing. |
Routes must be unique across the entire client. A route name can only be used once in the gateway and cannot be reused in any other endpoint configurations.
When to use Sync/Async API
| Feature | Synchronous | Asynchronous |
|---|---|---|
| Best For | Real-time validation, status queries. | High-volume uploads, bulk telemetry. |
| Client Experience | Waits for processing completion. | Receives instant acknowledgment. |
| HTTP Success | 200 OK | 202 Accepted |
For the shown example, this defines a full route at:
POST https://rcom-gateway.example.com/RCOMENDPOINTAPI/inventory/productScanPost
Adding Multiple Routes
You can define multiple routes under the same API Endpoint, allowing modular, RESTful behavior under a shared namespace.
| Route Path | Purpose |
|---|---|
| /RCOMENDPOINTAPI/inventory/productScanPost | Accepts barcode/RFID scan data |
| /RCOMENDPOINTAPI/inventory/update | Update product stock levels |
| /RCOMENDPOINTAPI/inventory/status | Query the current inventory |
Use the “+ Add New" button to keep adding more handlers.
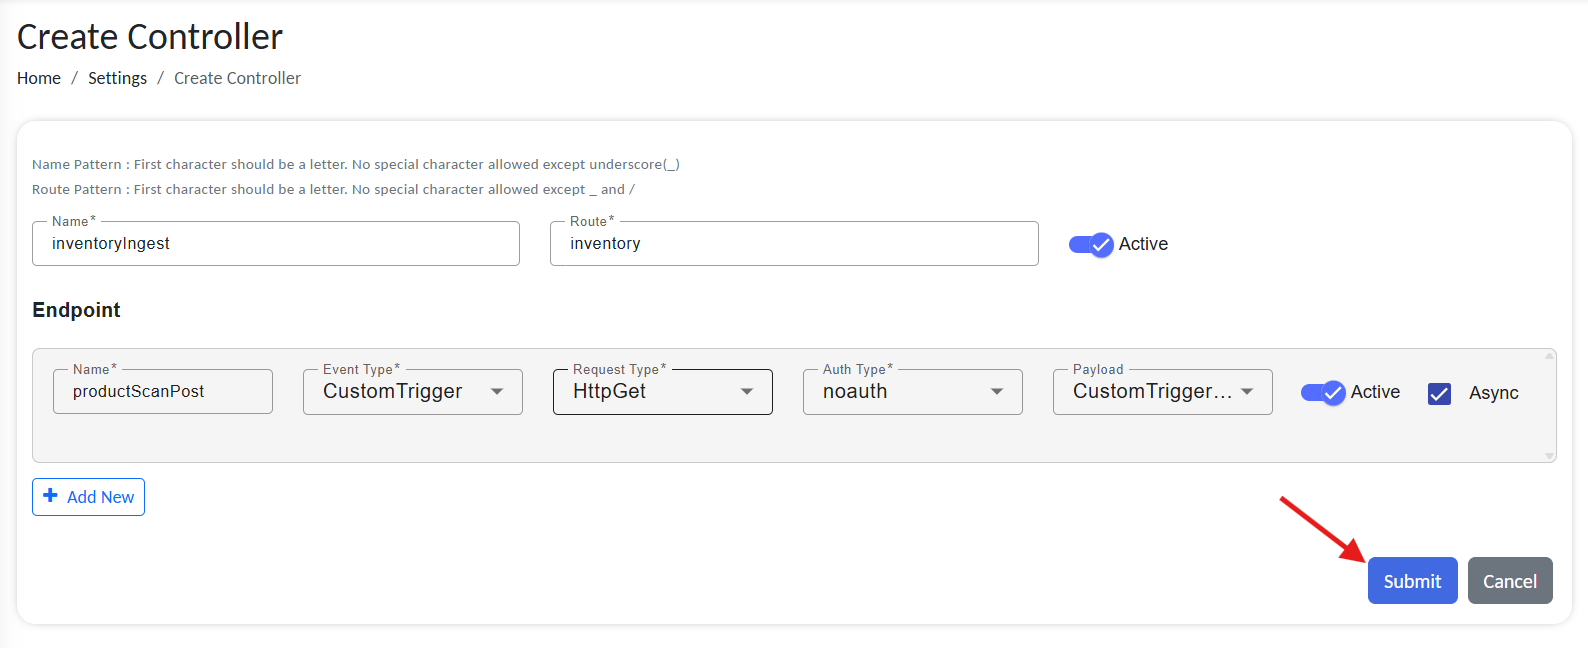
Step 3: Publish Routes
Once you’ve filled out all fields, click Submit to save the endpoint and routes. Your API is now live and ready to receive data.
Publish new API endpoint
HTTP Method Behavior in RCOM Gateway
HttpPost (Receive Data)
This method is used when external systems send data into RCOM Gateway.
- The data (typically JSON) is included in the body of the request.
- RCOM Gateway processes this payload according to the Route's configuration.
✅ Use when external clients or devices need to push scanned tags, inventory updates, or sensor readings into RCOM Gateway.
Example:
POST /RCOMENDPOINTAPI/inventory/scan
Body:
{
  "deviceId": "scanner-001",
  "barcode": "1234567890",
  "timestamp": "2025-05-27T10:15:00Z"
}
HttpGet (Respond to Queries)
This method is used when external systems want to request data from RCOM Gateway.
- Parameters are passed via the URL query string.
- The response typically includes a data snapshot or status info.
✅ Use when a client needs to fetch the latest state of an object, verify a tag, or query past events.
Example:
GET /RCOMENDPOINTAPI/inventory/status?productId=123456
Testing the Route in Postman
- Open Postman and create a new request.
- Method:
POST - URL:
https://rcom-gateway.example.com/RCOMENDPOINTAPI/inventory/productScanPost
- Authorization Tab:
- Type:
Bearer Token - Token:
YOUR_OAUTH_TOKENif any.
- Type:
- Headers Tab:
Content-Type:application/json
- Body Tab:
- Select:
raw+JSON - Paste your payload:
- Select:
{
  "deviceId": "scanner-001",
  "barcode": "1234567890",
  "timestamp": "2025-05-27T10:15:00Z"
}
- Click Send
✅ A 200 OK or 202 Accepted response confirms the route is working.
Final Checklist
Before going live:
✅ Confirm your base path and route names follow correct syntax.
✅ Use OAuth2 or Basic auth in production environments.
✅ Validate your payload mappings for each event type.
✅ Test your route using Postman or curl.