Adding an External Authentication System (OpenID)
RCOM Gateway supports integration with OpenID Connect (OIDC) providers to enable secure Single Sign-On (SSO) and centralized identity management. This guide walks you through configuring an OpenID-based authentication system using the Admin Console.
Where to Begin
From the Gateway Dashboard go to:
Settings → Client Settings → Auth Systems
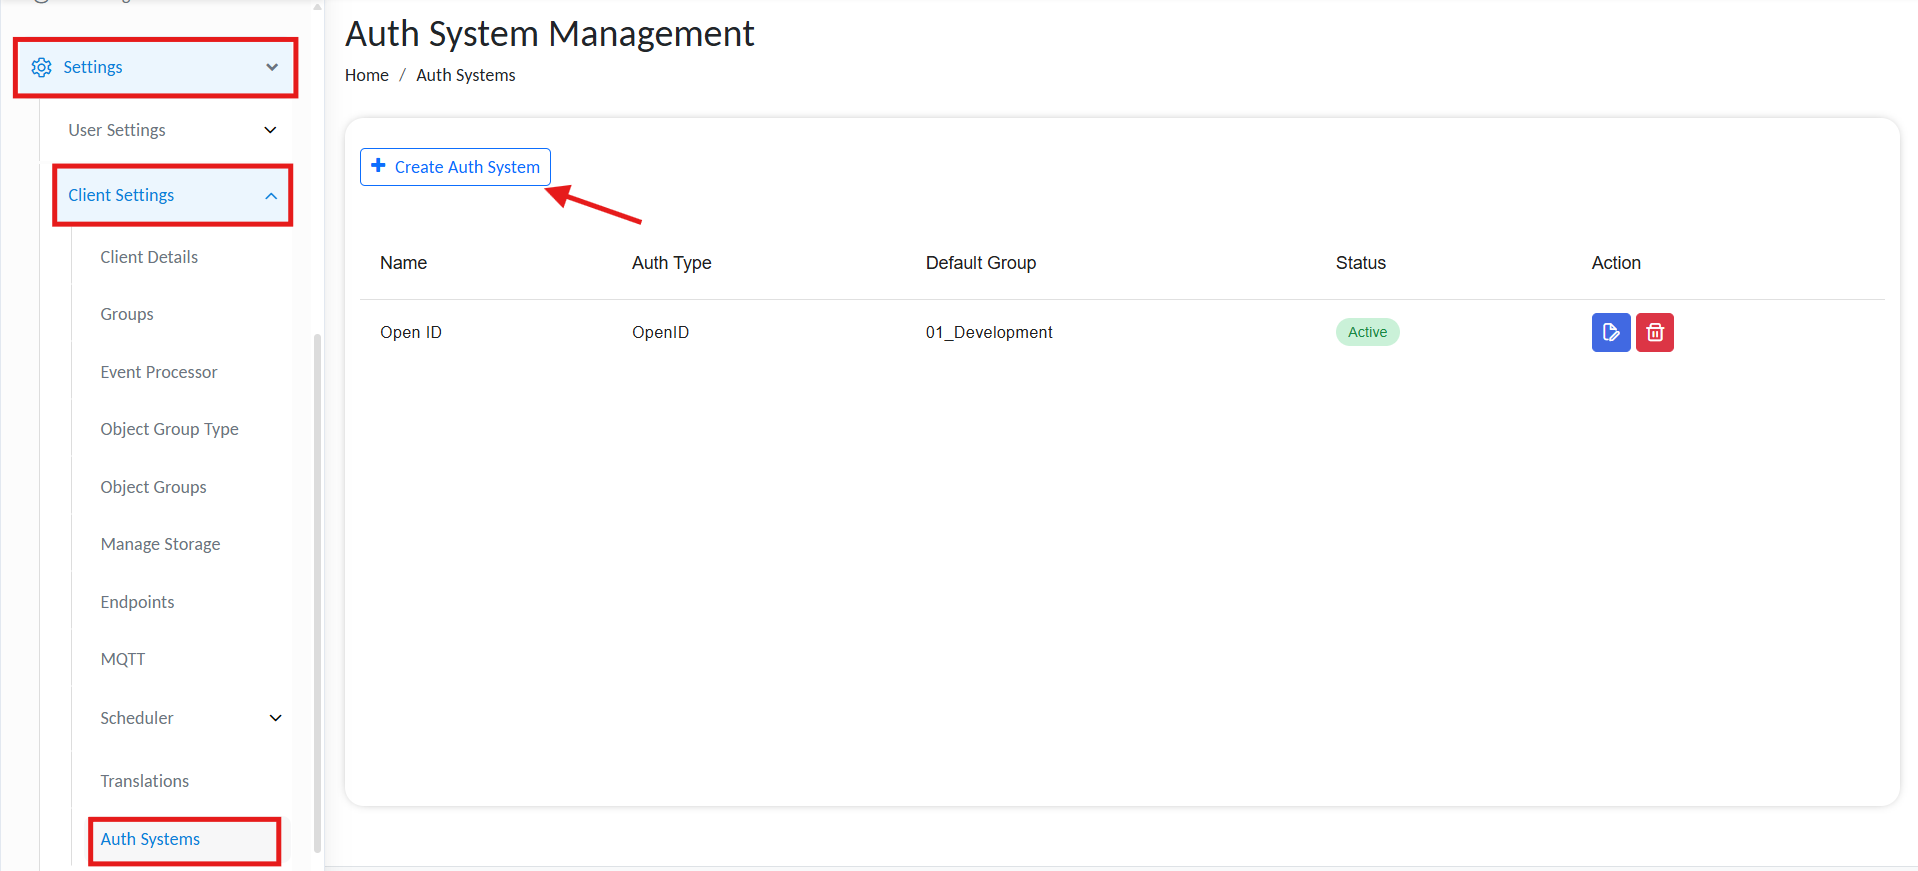
Add new auth system
-
Click ➕ Create Auth System
-
You will be redirected to the Create Auth System page.
-
Under Name, provide a display name for your auth system.
-
In the Auth Type dropdown, select OpenID.
Currently, only OpenID is supported. LDAP configuration is not applicable at this time.
Auth System Configuration
Once navigated to the form, fill in the following fields.

Add basic authentication info
Basic Information
| Field | Description |
|---|---|
| Name | A unique display name for the authentication system (e.g., AzureAD_SSO). |
| Auth Type | Set to OpenID. |
| Authentication Endpoint | Authorization URL from the provider (see below). |
| Default Group | Select the default RCOM Gateway Group for authenticated users (e.g., Admins). |
🔗 AUTHENTICATION ENDPOINT:
Must include the tenant-specific authorization URL. For Azure:
https://login.microsoftonline.com/<TENANT_ID>/oauth2/v2.0/authorize
Parameters
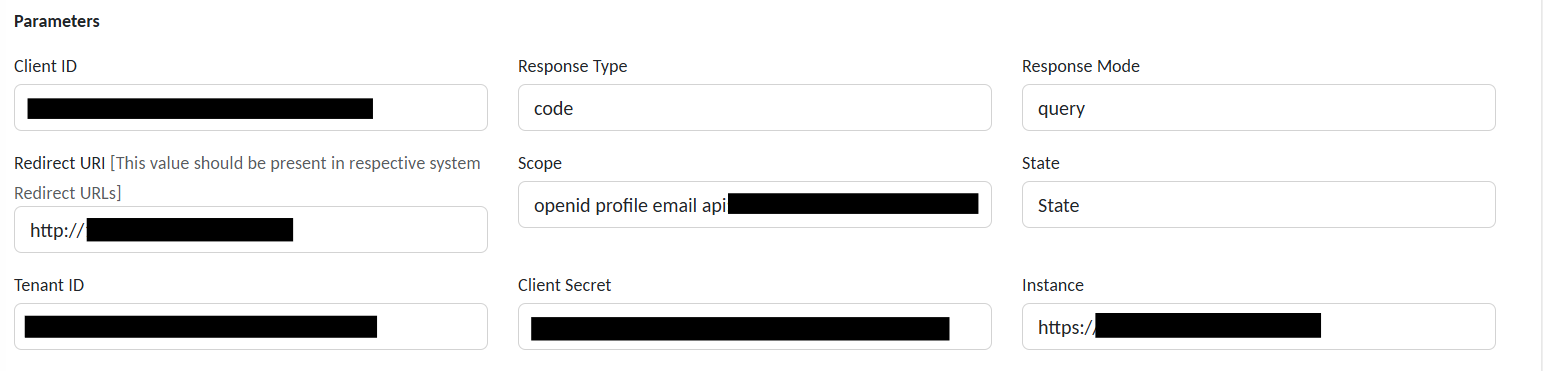
Add authentication parameters
| Field | Description |
|---|---|
| Client ID | Unique identifier for the registered application in your identity provider. |
| Response Type | Type of OAuth2 response expected (e.g., code for authorization code flow). |
| Response Mode | Method used to return the authorization response (e.g., query, form_post). |
| Redirect URI | Must exactly match one of the URIs registered in the OpenID provider's app. |
| Scope | List of requested claims (e.g., openid profile email). |
| State | Optional. Protects against CSRF attacks or used to maintain request context. |
| Tenant ID | Identifier for your identity provider tenant (e.g., Azure AD Directory ID). |
| Client Secret | Secret key associated with the Client ID (used for token exchange). |
| Instance | Base URL of the identity platform (e.g., https://login.example.com/). |
Role & Group Mapping
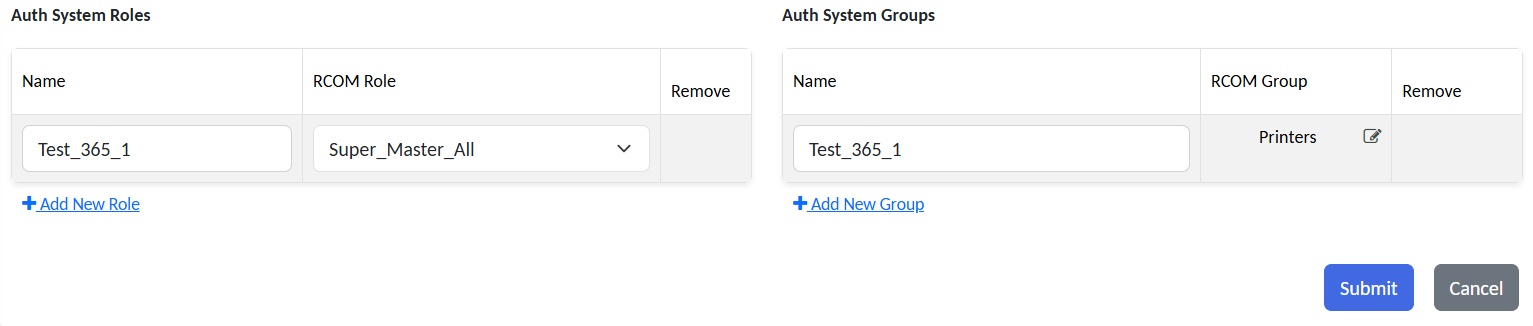
Map user roles and access groups
Auth System Roles
Define mappings between external user roles and RCOM Gateway roles.
| Field | Example |
|---|---|
| Name | External_Admins |
| RCOM Gateway Role | Super_Master_All |
Use ➕ Add New Role to define more.
Auth System Groups
You may also map specific external groups to internal RCOM Gateway access groups.
| Field | Example |
|---|---|
| Name | Wave1Users |
| RCOM Gateway Group | Maps |
Use ➕ Add New Group to map more groups.
Submit & Activate
-
Click Submit to save the configuration.
-
Your new OpenID Auth System will appear in the Auth Systems list.
RCOM Gateway will now delegate login to this identity provider.

Auth system in action
Validation & Best Practices
-
🔐 Always use HTTPS in all Redirect URIs and Instance URLs.
-
🧪 Ensure the client app is properly registered in your OpenID provider.
-
✔ Confirm the redirect URI is exactly matched in the provider configuration.
-
👥 Carefully map roles and groups to avoid unauthorized access.
Example
| Field | Example Value |
|---|---|
| Auth Endpoint | https://login.example.com/<TENANT_ID>/oauth2/v2.0/authorize |
| Client ID | xxxxxxxx-xxxx-xxxx-xxxx-xxxxxxxxxxxx |
| Client Secret | *************** |
| Scope | openid profile email |
| Response Type | code |
| Response Mode | query |
| Redirect URI | https://your-gateway.example.com/RCOMUI/ |
| State | customStateValue |
| Tenant ID | <TENANT_ID> |
| Instance | https://login.example.com/ |
| Default RCOM Gateway Group | Admin |
| Mapped Role | External Role: Example_Admins → RCOM Gateway Role: Super_Master_All |
| Mapped Group | External Group: Example_Group_1 → RCOM Gateway Group: 00_Live_Wave1 |